Some models have raised parts that usually are different colors - on gunpla these usually appear on the chest and sleeves. It would be tedious and hard to either mask or hand paint these details with little margin for error. Thankfully, using the natural properties of the different types of paint and thinners available, we can create a natural reverse wash that makes crisp lines and a great finish.
Materials needed:
- model part with raised accents
- primer
- either acrylic or lacquer paints (I use Tamiya's synthetic lacquer spray cans in this example) This will be your accent color
- Acrylic or lacquer thinner
- enamel paint (your base color)
- Enamel thinner
- zippo lighter fluid (turpenoid-based)
- q-tips
- gloss top coat (future is excellent for this). Make sure it is NOT enamel-based.
- Airbrush
As I try to write to include everyone, I'll start off with some basics. If you know about the different properties of paints and thinners, feel free to skip this section.
In general there are 4 major types of paints used in all of model painting. There may be more, but I will be writing on these.
- Acrylic
- This is a plastic polymer paint that is the 'lightest' of all paints I will be describing. It dries in about 20 minutes, and cures in about 24 hours. It is 'water-based' - meaning it can be thinned with water. For airbrushing, we use an alcohol-based thinner that is lighter and dries faster than water.
- Enamel
- This is a paint that usually dries to a hard, glossy finish, and takes usually a few hours to dry, with 24-48 hours curing time. It requires a stronger thinner than acrylic to be thinned properly. Enamel is special also in that a turpenoid-based lighter fluid - like zipppo lighter fluid - can also thin it out (not for airbrushing).
- Lacquer
- This is the 'strongest' paint as far as pigment goes. It is relatively fast drying (around the same as sprayed acrylic) but requires the strongest thinner. Lacquer thinner is dangerous and should be used only in controlled areas with proper breathing precautions taken.
Note: Lacquer thinner can thin all 3 paints listed above, enamel thinner can do both enamels and acrylics, and acrylic thinner can only thin acrylics. However, I would only use the proper thinner with each paint. I use cheap lacquer thinner to clean out all my parts after using them.
The final type of paint is Oil
- This is a very slow drying paint where pigment is put into a type of oil. As a result, mineral spirits is usually used to thin oil paints. Oil paints are not airbrushed and useful for creating weathered washes.
What is a wash?
A wash is a cover-all term used to describe any process where you go over a model in two different types of paint, and use the different properties of them to work in harmony for a desired effect. The most common type of wash is for panel lining - after a model has gotten a lacquer or acrylic coating, lighter fluid and enamel paints are used to fill in panel lines. I will have a tutorial soon.
For this tutorial, we will be doing what is called a 'reverse' wash. It is the same basic concept as with panel lines, but when we take away the enamel paint using lighter fluid, we will be showing another paint layer beneath the enamel - either acrylics or lacquers. This is how it is done:

1. Choose your part.
2. Prime your part.
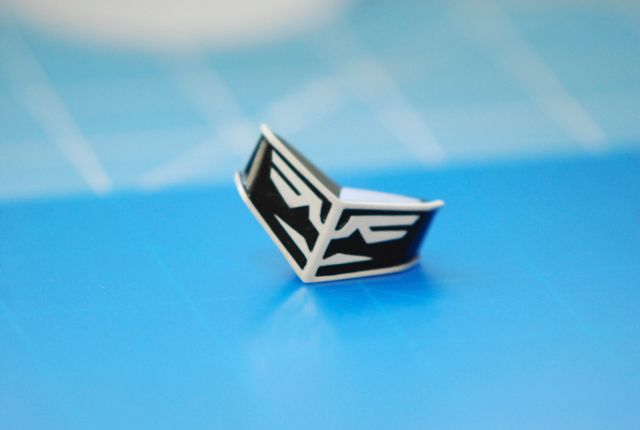
3. Paint your entire part the color of the raised ACCENTS in either lacquer or acrylic ONLY. On this wristband, I want the emblem to be white; on a Sinanju, you would paint this gold. Here I am using Tamiya's synthetic lacquer spray cans. I went lazy and just did spray cans because I had them lying around. You usually want your paint to be glossy here.
4. Once it dries, spray a glossy top coat on. I used Future floor shine (which is acrylic-based), but you can use anything non-enamel.

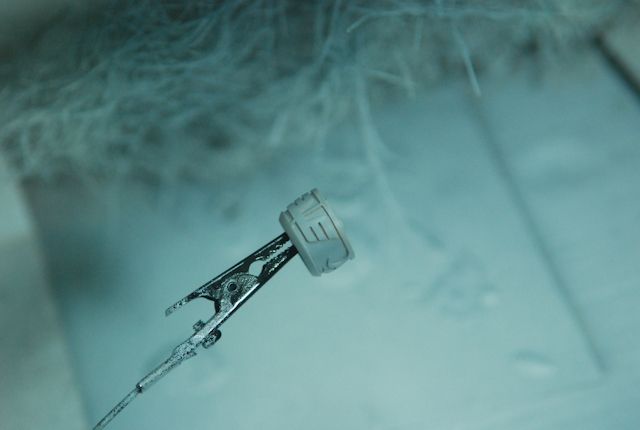
5. Spray on your enamel paint for the fill color (here it is black, it would be the same on the Sinanju). Gloss helps a lot, but it is not totally necessary. It really does help though.
6. Let the part dry for 12-24 hours.
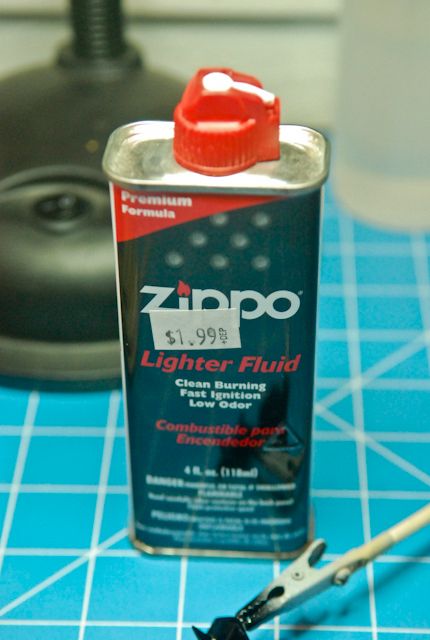
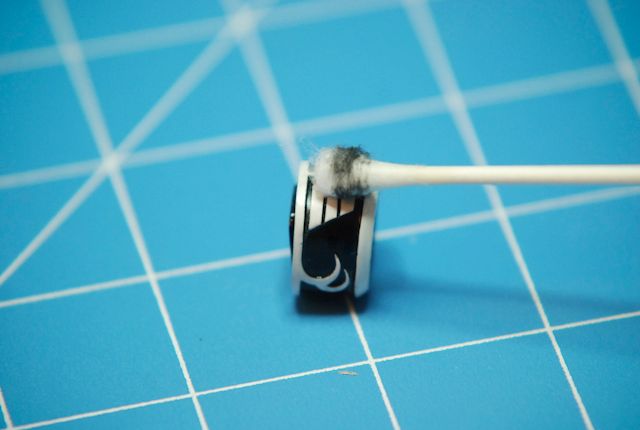
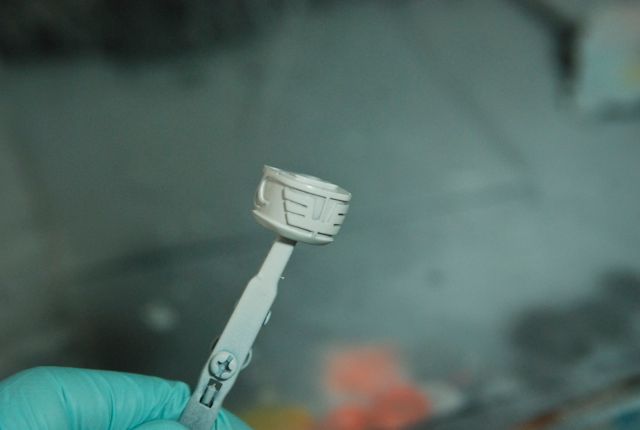
7. Using your q-tip, get it damp/wet with lighter fluid and GENTLY rub it across the raised emblem surfaces. Watch as the enamel just comes right off! Be very careful not to press too hard, and don't be afraid to change out your q-tips. I use about 5-12 swabs per piece depending on the work needing to be done.
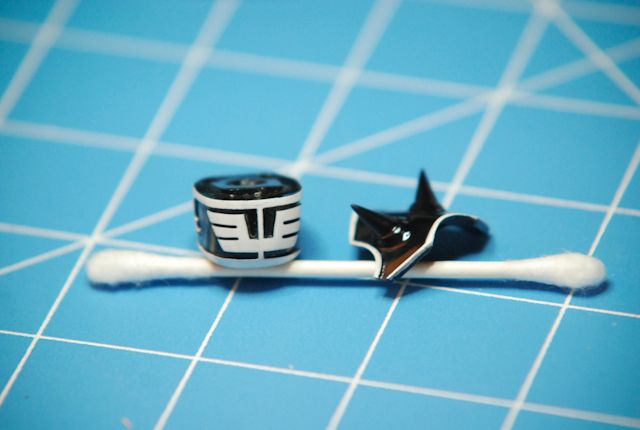
8. Clean up the remaining paint on the surfaces once your are done with CLEAN, lightly damp q-tips, and voila, you are done! Add your flat or gloss coat to protect it.


Thank you so much, this was very helpful :D
ReplyDeleteOh I do have a question thou about the steps above, one part was confusing:
ReplyDeleteI am painting the emblems on my Sinanju and want to try your method.
I don't have an airbrush so I will be using Tamiya TS spray paints (Are these lacquer?) http://www.tamiya.com/english/products/list/spray.htm
1. Prime
2. Paint the accents gold, now do I need to use a brush to paint the accents ONLY or can I just spray the whole thing gold? Probably using TS-21 Gold. (Use lacquer in this part? And you said "You usually want your paint to be glossy here", but how would I make my paint glossy?)
3. Brush my future on.
4. Spray/paint gloss(?) Black, must be enamel? Tamiya has TS-29 Semi-Gloss Black, but I don't think that's enamel..? If so what's a good enamel black I can use?
5. Zippo + Q-top
6. Seal with top coat? Lacquer or acrylic doesn't matter right?
Sorry for so much questions, but I really want to do this right! I will also be using this method for my Kshatriya. Thanks!
Ok so I'll answer this in numbered form, but start off on the right foot. If you're going to be using spray cans on the Sinanju emblems, buy these: primer, Tamiya Gold synthetic lacquer, Tamiya Clear Spray (optional, Testor's Enamel Gloss Black.
ReplyDelete1. Prime
2. Spray the entire part gold
3. Either brush your future on, or spray your Tamiya Clear
4. Spray your gloss enamel (through Testor's or Model Master)
5. Qtip
6. Seal it with either acrylic orlacquer, yeah.
It's great that you're asking, and it's easier than you think once you do it! You may screw up once (like I did), but only do it on 1 part first! Taht way you can just clean it off and start again.
Glad that you liked the tutorial though.
Hey thanks! That answered all my questions ^^
ReplyDeleteI am planning to get a compressor/airbrush kit, what do you think about this:
http://cgi.ebay.ca/ws/eBayISAPI.dll?ViewItem&item=160572230953&ssPageName=STRK:MEWAX:IT
item # 160572230953 in case link doesn't work.
I know people recommend iwata etc but they are hard to find and expensive and I just want to get something that is relatively cheap but can last a few years and provide good results. For me to practice and learn ^^
Actually, I think I may have found a better one that seems more legitimate.
ReplyDeletehttp://cgi.ebay.ca/ws/eBayISAPI.dll?ViewItem&item=360344447323&ssPageName=STRK:MEWAX:IT
360344447323
They both look pretty good, and I know folks who have gotten the first set on gundam-eclipse.com. I would go with either, those compressors look pretty good, and 0.3mm nozzle is all you really need!
ReplyDeleteThanks!
ReplyDeleteBy the way, is it okay instead of using spray in step 2, I brush on paint? Since I'd have to buy a can of silver and gold for Kshatriya and Sinanju and that's kinda a waste considering I won't finish them. And I'll buy bottles of gold and silver for small detailing anyways, can use those? Don't know if that'll create problems when using q-tips to remove later..
Nice tutorial.
ReplyDeleteAwesome tutorial :D
ReplyDeleteadding you to my list of bookmarked modeling blogs to follow
Hey MW - I have a quick question for you - I've been trying to use India Ink for panel lining, and I noticed you use FFA for your gloss coat - do you just fill up your air brush with the FF and spray it on real well or is there something else I could to to make sure the ink doesn't seep through the coat (as it did with my last kit)?
ReplyDeleteI know this is a bit late, but korewagundam - in order to get a true effective coat of Future, you must spray 2-3 thin coats at LEAST. Make sure you see a sheen when spraying, to know that it's covered, otherwise it's not truly protected between layers.
ReplyDeletefantastic work. I just got this for Christmas and I am,apprehensive to say the least to start the trim. I have an idea I would like to bounce off of you. Sort of a reverse wash technique with a twist. Paint the parts with gold acrylic then put the foil stickers then paint over with black enamel, then pull off the stickers. If it's done with a light coats there should be very little bleeding. If there is, just clean up with thinner. Does this make sense?
ReplyDeleteI simply couldn't recommend acrylic for anything like the Sinanju chest piece. The acrylic reverse wash I tried, I like to think I made perfect conditions for it to work, and it still refused to completely come off. I would stick to using the top part of the reverse wash being enamel, and using lighter fluid to remove it. Simply the least harsh, and best results time and time again.
ReplyDeletesir would it be possible to do this method in hand brush if i use the following procudure:
ReplyDelete1: paint the whole wrist w/ x-12 gold leaf enamel, apply 2coats. dry for 24 hrs
2: paint the it w/ x-24 clear yellow acrylic, 2 coats apply.
3: then paint it again w/ x-1 black 1coat apply. dry for 24hrs
4: then q-tip
5: spay clear coat..
i cant use spray paint.. coz i only have time in the evening after work. i hope you reply.. thanks in advance.. thanks also for the tutorial.. it really help alot
@ Anon - It would work. Step 2 (with acrylic) would be especially important as this will seal your enamel paint underneath. Step 3 would need to be done with enamel, and the q-tip with lighter fluid as I recommended. It should work! Post a pic if you accomplish this! Remember, the first time it won't turn out very nice (almost always). Never give up though! Patience is key!
ReplyDeletewow load of thanks.. i will post the pic....
ReplyDeletegoing to give this a try....on my Geara Zulu
ReplyDeleteany tip about the ratio of thinner and paint in enamel.. for airbrush
ReplyDeleteDoes it really requires to use enamel for your "fill" color??
ReplyDeleteFor enamel paint in an airbrush - do a 1:1 ratio! And for my method (and the most reliable), I wholly recommend enamel. It's the only thing that will work with the lighter fluid. I describe why this is in the beginning of the article.
ReplyDeleteThis is superb ! Why did the guys in Japanese magazines sugest every method BUT this one ?
ReplyDeleteI'll be getting some cheaper kit to try this on before moving to the sinanju though ;)
thanks for all teh tips.
i was curious to know if I could do this with spray cans?
ReplyDeleteI was looking up Tamiya Clear Spray on amazon but i cant seem to find it.
You can use spray cans I suppose (though airbrushing is cheaper and easier hehe). Make sure your base color is a lacquer or acrylic, then spray enamel paint and use the lighter fluid. Let me know if this works! I get lots of questions regarding spray cans.
Deleteso it doesnt matter what brand? as long as it says lacquer or acrylic on it? like I could use testors or something?
Deleteanother question. in step 4 I apply future but do I let that dry before I go onto step 5?
ReplyDeleteAbsolutely! It needs to be dry, and it takes ~6+ hours to dry in my experience.
DeleteHan here,
ReplyDeletehow did u do the shield edges part? because simply reverse washing it wouldn't be possible (the gold part is actually deeper than the black part.
also, the red part, did u just used masking tape?
Major, THANK YOU SO FREAKING MUCH for this tutorial. I have been putting off painting my Sinanjus and Kshatriya simply because I couldn't stand how sloppy all of the methods I've seen for doing the sleeves/chest stuff looked. I WILL be giving this a shot!
ReplyDeleteI had one question about it. How will this affect stuff like the Alclad metallic paints, which require an enamel black undercoat (or at least the chrome does, which is all that I have at the moment)?
Zircor - see step 4 - if you apply a gloss coat you will be fine!
ReplyDeleteDoes it still work the same way if you put lacquer as the accent color and acrylic as the base? And then wipe it off with acrylic thinner.
ReplyDeleteYou have great tutorials! Thanks again! I do have one quick question. Is there a way to make this work with only using acrylic paints? I use tamiya acrylics, I want to use the X-13 (metallic blue) as my bottom coat and X-63 (german grey) as my top coat. Is there any way I can make this work?
ReplyDeletethanks
Great tutorial,what are your thoughts on liquid masking solution??
ReplyDeleteIt sucks. It added a green paste to the top of my paint even with top coat on. It did not come off either, I had to prime and paint over the spots.
DeleteThanks for this great tutorial. Now I can work the proper paintings on my MG Sinanju.
ReplyDeleteWeird question, but I completely forgot to put a future coat on mine before I put the enamel paint on top. Will the enamel thinner/lighter fluid destroy the lacquer paint that I have underneath?
ReplyDeleteNo, the lighter fluid will not take off the lacquer paint. Just make sure you do not press too hard. Just press hard enough for the enamel paint to come off!
DeleteFew questions, since tamiya is kinda hard to come buy where I live how do the testors lacquer sprays come out? Do they work as well? And will enamel thinner work the same as the lighter fluid?
Deletegreat tutorial ... this helps a lot ....
ReplyDeleteHi, how would it work if I hand painted with Tamiya acrylic paint (thinned with Tamiya acrylic thinner) with Tamiya enamel on top? I've read things about enamel thinner+acrylic being bad news so should I just thin the enamel with lighter fluid or can I use the Tamiya enamel thinner to thin the black enamel for the hand painting?
ReplyDeleteAlso, is the coat between the acrylic and enamel layers essential? Can I skip that step? If not can I possibly use Tamiya flat top coat in between
Sr can I use brush for yhe reverse wash
ReplyDeleteTried this and doesn't work. Followed the exact steps. Used white base coat of Vallejo acrylic. Used future to gloss it. Dried for 48 hrs. Sprayed model masters black enamel, which is a huge pain to clean the air brush, and stinks like crazy. It's so dang messy and hard to clean, but I got the parts painted. Let it dry for 48 hours. Got zippo lighter fluid and went over it gently, and it certainly does not come off quick or easy, when it started to come off after 5 qtips, the recessed areas ALSO started coming off, and this is gently just trying to get the raised areas.
ReplyDeleteNot sure what I'm doing wrong.
Thank you I am glad about the encouragement! I love your site, you post outstanding. woodbridge painting
ReplyDelete